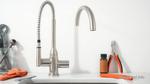
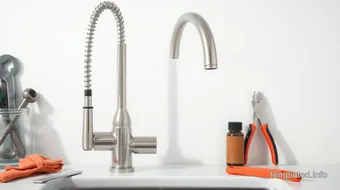
How to Reattach Your Delta Kitchen Faucet Sprayer Thumb Control: A Complete Guide
Learn how to easily reattach your Delta kitchen faucet sprayer thumb control with our step-by-step guide and essential maintenance tips.
Understanding Your Delta Kitchen Faucet
So, you've got a Delta kitchen faucet. Nice choice! Delta is known for its sturdy, reliable fixtures. They offer a mix of styles from the classic to the sleek and modern. You might be dealing with models like the Delta Touch2O, which lets you use just a tap to turn on the water, or maybe an old-school Delta single-handle model. Regardless of what you’ve got, there’s a good chance you’ll need to understand a bit about it for maintenance.
Overview of Delta Faucet Models
Delta kitchen faucets come in all shapes and sizes. If we’re talking about pull-down sprayers or the standard side sprayers, they all have their quirks. Some models feature magnetic attachments to keep the sprayer in check, while others might have a more traditional hose. It's like choosing between a trusty steed and a fancy new bike—each has its benefits! Knowing your model helps when you're figuring out how to reattach a Delta kitchen faucet sprayer thumb control, trust me.
Common Features of Kitchen Faucet Sprayers
Now, let’s chat about sprayers. Kitchen faucet sprayers can be a real lifesaver. They help with washing veggies, rinsing dishes, and even filling pots. Most sprayers come with two settings: a nice wide spray and a focused stream. This flexibility is brilliant when you want to wash fruit or get all the gunk off that stubborn pot. Oh, and if you’ve got a pull-out or pull-down sprayer, it often means you can reach those hard-to-get spots in your sink. That’s like the icing on the cake!
Importance of the Thumb Control Mechanism
Now, if I could point out one essential feature you need to appreciate, it’s the thumb control mechanism. It’s that little handle or button you push to switch between spray modes. This tiny thing makes life significantly easier. Imagine if you had to juggle a pot and twist knobs at the same time... not fun, right? This mechanism makes it so you can keep one hand free for other tasks, making your time in the kitchen less chaotic.
So, if your sprayer thumb control is acting up, don't just stand there! Making sure it works right can make your kitchen life smoother. Plus, knowing how to reattach a Delta kitchen faucet sprayer thumb control opens a door to more DIY adventures in your home. It’s all about learning and improving, bit by bit! Remember, every broken piece is just a lesson waiting to happen, and fixing your faucet is a mighty good skill to add to your toolbox.
Tools Needed for the Job
Getting your hands dirty while learning how to reattach a delta kitchen faucet sprayer thumb control may sound a bit daunting, but fear not! With the right tools, you can make this process smoother than a well-tuned lute. So, let’s dive in and check out what you need to tackle this task.
Essential Plumbing Tools
First things first, let’s gather the main players. You’ll want to grab the following tools:
- Adjustable Wrench : This little guy is a must for gripping those pesky nuts and bolts.
- Screwdriver Set : Flathead and Phillips screwdrivers will help you with various screws. Trust me, they’ll make your life easier.
- Pliers : A good pair of pliers can be a game-changer when you're dealing with tight spaces.
- Utility Knife : You never know when you’ll need to trim off a bit of old tape or sealant.
- Tape Measure : Measure twice, cut once—and in this case, it’s about making sure your parts fit just right.
Optional Tools for Easier Reattachment
Now, if you want to make things even easier—and who doesn't?—consider snagging a few optional tools:
- Pipe Wrench : If your faucet has some stubborn pipes, this tool might become your new best buddy.
- Basin Wrench : Great for those hard-to-reach nuts under the sink. It'll save you a lot of forehead smacking.
- Flashlight : Because, let’s face it, it always seems darker under the sink than you expect.
Safety Equipment Recommendations
Before you go all-in on your faucet project, let’s talk about safety. You wouldn’t want to end up like that poor knight who forgot his armor, right? Here’s what you should wear:
- Safety Goggles (MD) : Protect your peepers from any wandering water or debris.
- Work Gloves (MD) : Keep your hands safe from sharp edges and grime. You want clean hands for cooking later!
- Knee Pads (MD) : If you're going to be down on the floor for a while, these will make your knees feel like royalty.
So there you have it—a toolkit fit for a bathroom warrior! With the right gear in hand, you’ll be ready to tackle how to reattach a delta kitchen faucet sprayer thumb control like a pro. Remember, every warrior needs their tools, and you're gearing up for success!
Preparing for the Reattachment
Alright, so you’ve decided to tackle the task of reattaching the sprayer thumb control of your Delta kitchen faucet. Good on you! Before diving in, let’s set the stage for success with a bit of prep work. Trust me, this will make your life a whole lot easier as you learn how to reattach a delta kitchen faucet sprayer thumb control.
Assessing the Current Condition of the Sprayer
First things first, take a good look at your sprayer. Is it all beat up or surprisingly intact? If the sprayer looks worn out, it might be wise to consider replacing it altogether. Check the hose for any cracks or wear—after all, nobody wants a leaky mess when the job's done. Look for any loose screws, and don’t forget to check the thumb control itself. Is it moving freely, or is it sticking like a stubborn mule? Knowing its condition will guide your next steps and save you headaches down the line.
Cleaning the Work Area for Better Accessibility
Now that you’ve inspected the sprayer, let's make your workspace as inviting as a cozy English pub. Clear off the clutter from under your sink or wherever you're working. This isn’t just about keeping your mom happy—it’s about giving yourself room to maneuver. A clean area helps you see what you’re doing, grab tools easily, and, trust me, reduces the risk of losing small parts. You’ll thank yourself when you’re knee-deep in the process and not digging through a mountain of old sponges or who-knows-what.
Identifying Faucet Parts and Compatibility
Here comes the fun part—identifying the parts you’ll need. Delta faucet parts are usually pretty straightforward, but always double-check that your sprayer is compatible with your model. Look at the model number; it’s often tucked away somewhere on the faucet or in the manual. If you can't find the manual, don’t sweat it! A simple internet search can pull up what you need. Make sure you’re dealing with the right hose and thumb control—like trying to fit a square peg in a round hole, it just won’t happen!
Gathering your parts ahead of time will save you that heart-sinking moment when you realize you forgot a washer or a clip. And we’ve all been there—standing in the aisle at the hardware store, desperately hoping someone knows what you're looking for.
So, there you have it! With a little assessment, some cleaning, and part identification, you’re ready to jump into the actual reattachment. Just think of it as assembling a hearty feast in the kitchen—prep work is key!
Step-by-Step Reattachment Instructions
Getting your Delta kitchen faucet sprayer thumb control back in action can feel a bit like a modern-day quest — think of it as your own little adventure, much like an Anglo-Saxon hero preparing for battle. With a few simple steps, you’ll have your sprayer working like new again. Let’s dive in!
Removing the Old Sprayer Thumb Control
First things first, you need to take off the old sprayer thumb control. This may sound a bit daunting, but trust me, it’s easier than dodging arrows on a battlefield! Here’s how you do it:
-
Turn off the Water Supply : You don’t want a mini-waterfall in your kitchen, do you? Locate the valves under the sink and twist them off.
-
Detach the Hose : Grab a wrench and unscrew the hose from the sprayer. Hold it steady to avoid twisting the entire faucet. If you find it’s stuck, a bit of gentle persuasion might help — just don’t go full medieval on it.
-
Unscrew the Thumb Control : Usually, there's a small screw that holds the thumb control in place. Find it and loosen it with a screwdriver. Once it’s loose, pull the old control off.
Remember, keeping a towel nearby is a savvy move; you never know when a splash might sneak out!
Attaching the Sprayer Handle
Now that the old control is out of the way, it’s time to fit the new sprayer handle like a glove. Here’s how:
-
Line It Up : Take your new sprayer control and align it with the hose. It should slide on easily. No need to force it — if it doesn’t fit, something’s off.
-
Secure the Handle : Once it’s positioned perfectly, use that same screwdriver to insert the screw. Tighten it snugly but not overly so — you don’t want it to crack under pressure, kind of like a brave knight buckling under armor without a breather.
-
Reconnect the Hose : Now, thread the hose back onto the sprayer. Use the wrench to secure it, but give it just enough love so it’s not a wrestling match.
Final Adjustments for Proper Function
Alright, hero of plumbing, we’re in the homestretch! Just a few tweaks to ensure everything runs smoothly:
-
Turn the Water Back On : Slowly turn the water supply back on and check for leaks. If you spot any drips — like unwanted guests — just recheck your connections.
-
Test the Sprayer : Give the sprayer a good test run. Press that thumb control like you mean it! If it’s functioning well, pat yourself on the back — you’ve just completed a handy mission!
-
Adjust If Needed : If it’s still being fussy, double-check all screws and connections. Sometimes a simple re-tightening can make all the difference.
Learning how to reattach a Delta kitchen faucet sprayer thumb control might seem like a chore, but with a wee bit of patience and these steps, you’ll be back to cleaning those dishes in no time. So roll up those sleeves, channel your inner craftsman, and conquer that sprayer!
Common Issues and Troubleshooting
So, you’ve tried to fix that Delta kitchen faucet sprayer thumb control, but now you're facing a few hiccups. No worries! Let’s roll up our sleeves and tackle some common issues head-on. You'll be feeling like a plumbing champ in no time.
Addressing a Loose Faucet Sprayer
First off, let’s chat about that pesky loose faucet sprayer. You might have noticed it wobbles around or just won’t sit right. This is usually caused by loose connections or worn out parts. Start by checking the mounting nut. You’ll likely find it under the sink. Grab a wrench—gently, though! You don’t want to overtighten it or risk breaking something. Just a snug fit should do the trick. If you’re still having trouble, it might be time to look at the sprayer hose. Over time, these can get a bit frayed or lose their grip.
A tip here: When you’re under the sink, it’s dark and cramped... so use a flashlight or your phone’s light to see what you’re doing!
Fixing Ineffective Water Flow Problems
Next up is fixing any water flow issues. If your sprayer spouts just dribble, that’s annoying, right? This can happen for a few reasons, like clogs or debris buildup in the nozzle. The first step is to detach the sprayer head and run water to see if anything is stuck in there. Sometimes, it’s just a quick rinse that’s needed to get things flowing again.
For any stubborn blockages, try soaking the sprayer head in vinegar. It’s the kitchen hero you didn’t know you needed! Let it soak for about an hour, then give it a good rinse. If the water flow still doesn’t improve, check the sprayer hose for kinks or damage. A pinched hose can really mess with your water pressure.
Solutions for Misalignment of the Sprayer Parts
Lastly, let’s get to those annoying misalignments. If the sprayer isn't pointing the right way or gets stuck, it’s usually a sign of improper installation or wear and tear. First, check how the sprayer attaches to the hose. Make sure everything clicks into place nicely. If not, you may need to reposition or even replace the connecting piece.
Sometimes, a good old twist is all it needs—like trying to find the right angle when tossing a horseshoe. Give it a nudge and see if it fits better. And if it's still a mess, you might want to look at the mounting bracket. That little piece holds everything together—and if it’s out of whack, you’ll notice pretty quickly.
Remember, don’t be too hard on yourself if you take a few tries to get it right. We've all been there, trust me. It’s a learning experience, and maybe... just maybe, you’ll slap yourself on the back once everything's back to normal.
Now, with these troubleshooting tips in your toolkit, you’ll know exactly how to reattach a Delta kitchen faucet sprayer thumb control and tackle those pesky problems when they arise. Happy fixing!
Maintenance Tips for Your Kitchen Faucet
So, you've fixed your Delta kitchen faucet sprayer thumb control, or maybe you’re gearing up to tackle that task. Let’s chat about keeping that sprayer working like a charm. Regular maintenance can save you a world of trouble down the line. Think of it like tending to a trusty steed; a little care goes a long way!
Regular Inspection and Cleaning Routines
First off, get into the habit of checking your faucet. I can't stress this enough! Every month, take a few minutes to inspect for any signs of wear. Is the finish shiny or has it lost some luster? Look for leaks around the base or hoses. A tiny drip might not seem like much, but trust me, it can lead to a nasty surprise in your water bill! Consider cleaning the aerator too; it can get gunky and affect your water flow. Just unscrew it, give it a good rinse, and pop it back on. Easy peasy!
If you’re not married to the idea of using harsh chemicals, a simple mix of vinegar and water works wonders. Just soak that aerator for a bit, and voilà! Cleaner water and better flow—what's not to love?
How Often to Check Sprayer Functionality
Now, let’s talk about that all-important sprayer functionality. Ideally, you want to check it every couple of weeks—especially if you use it often. Give it a good test: pull it out and see if it retracts smoothly. If the water sputters or the hose gets stuck, well, you’ve got a problem. But hey, don’t panic! Most sprayer issues can be sorted out in no time.
Oh, and don’t ignore your water pressure. If it feels faded, that’s a red flag. A little troubleshooting can often get you back to that glorious spray you love. Besides, it’s easier to fix things before they turn into a full-blown disaster. Trust me—been there, done that!
Simple DIY Fixes for Common Faucet Problems
Okay, let’s roll up our sleeves for some simple fixes. Maybe your sprayer suddenly started leaking, or that thumb control feels a bit loose. Don’t fret; here are a few quick fixes:
-
Tighten Loose Connections: Grab a wrench and tighten those nuts. Sometimes a little elbow grease is all you need.
-
Replace the O-Ring or Cartridge: If you spot a leak, it might be time for a new O-ring or cartridge. Just shut off the water, unscrew the sprayer, and swap it out.
-
Unclog Drains: If your sprayer isn't pouring as it should, check for clogs. A good plunge can clear up most issues. Just remember to be gentle—too much force could lead to your sprayer flying off like a rogue knight!
Remember, keeping up with maintenance is key to a long-lasting faucet. If you don’t know how to reattach a Delta kitchen faucet sprayer thumb control, check out simple online resources or ask friends. There's nothing quite like having a fully-functioning kitchen faucet! You’ll thank yourself later when you’re washing dishes or filling up pots like a pro.
So, get out there and give that trusty faucet some love. After all, a well-cared-for faucet is just as mighty as any weapon forged in the fires of old! Keep it in tip-top shape, and enjoy the fruits of your labor every time you wash your hands or whip up a feast!
Frequently Asked Questions
Got a fussing sprayer on your Delta kitchen faucet? Don’t sweat it. Let’s dive into some questions folks often have while trying to figure out how to reattach a delta kitchen faucet sprayer thumb control.
How do I fix a loose faucet sprayer?
If your sprayer's feeling a bit wobbly, you might just need to tighten it up. Start by checking where it connects to the hose. There’s usually a nut there—grab a wrench and give it a gentle twist. Make sure you don't turn it too hard, or you might end up with a snapped hose. If it’s still loose, then the rubber washer might be cracked or worn out. You can find replacement washers at your local hardware store.
What tools do I need to reattach a faucet sprayer?
Ah, the toolbox—a well-stocked one is handy for this job. You’ll typically need an adjustable wrench, some pliers, and maybe even a screwdriver, depending on your setup. A flashlight can also be helpful to see what you're working with under the sink. And honestly, keep a cloth around—things can get a bit drippy.
Can I replace my faucet sprayer without a plumber?
Absolutely! Most folks can tackle this themselves. It’s not rocket science, I promise. Just follow the instructions that come with your new sprayer. Take your time, and maybe even watch a quick video online for a visual aid. It can feel like a mini adventure, and you get the satisfaction of saying you DIY’ed it. Just remember to turn off the water before you start!
How often should I maintain my kitchen faucet?
Good question! A little bit of routine can go a long way. Give your faucet a good clean every month—you know, wipe down the build-up, check for any leaks. As for deeper maintenance, check the connections and hoses every six months. It’s simple; a stitch in time saves nine, right? Catching small problems early means you save yourself the bigger headaches down the road.
What are common issues with Delta kitchen faucets?
Ah, Delta faucets are usually solid, but they do have their quirks. You might run into leaks, clogs, or loose handles. Sometimes the sprayer gets stuck, or the controls get unresponsive. Don't forget to check for mineral build-up if your water is hard— an occasional vinegar soak can work wonders. And if there's a drip, it could be a sign to replace a washer or O-ring.
There you have it! Feel armed with information on how to reattach a delta kitchen faucet sprayer thumb control and tackle those pesky problems with a bit of confidence. Every little improvement feels like a win, and hey, you'll have a story to share about your victory over bathroom woes!
Previous article: Craft Jesus Model in Infinite Craft Easily
Next article: Ultimate Guide to Reprogramming Firestick Remote
How to Reattach Your Delta Kitchen Faucet Sprayer Thumb Control: A Complete Guide: Share, Rating and Comments
0.0 / 5
0 Review